Photography for
modellers


Resources

Collections
Contact:
photoguide@tiono.com

Chapter 8. The Flying Aircraft

Revision 1.0 2007. Copyright by Tiono
Email: photoguide@tiono.com


Is it possible for a static aircraft model to fly? sure, it is possible... in a photograph.
How to do it?
We are now in digital age where photograph can be manipulated digitally using computer software, and of course, it can make your model aircraft to fly too.

There are two manipulation techniques:

- Single shot super-imposed background
- Multiple image super-imposed


This chapter will be presented in 5 pages:
Page 1. Single shot super-imposed background
Page 2. Multiple image super-imposed
Page 3. How to turn the propeller
Page 4. What kind of background to use
Page 5. Direction of light and color cast

Single shot super-imposed background

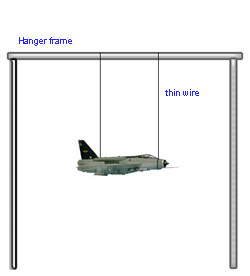
This method requires a natural background, easier to create than the Multiple image super-imposed, but its composition will be limited.

The model should be put in front of a natural or artifical background (such as a landscape, large photo or monitor screen). Then it is photographed.

The model itself can be sustained in a sheet of carton or any other flat surfaces between two boxes as a pillars to escalate the surface.
This method of placement will be limited to a sideview pictures in order to make the carton sheet seen at its minimum in the photo.

Another method is to hang the model using a very thin wire. This method gives more flexibility to arrange the position of the aircraft, and the camera angle will not be limited to only sideview.
But it has its own shortcomings; will need more computer works to eliminate the wire in the plane's body.
If you choose to do this method, do not use thread or any fabric material to hang the craft, but use wire. Because a thin wire will be less showing in a photo, and it able to sustain more weight than thread with the same thickness.

The example below, was created using this method.
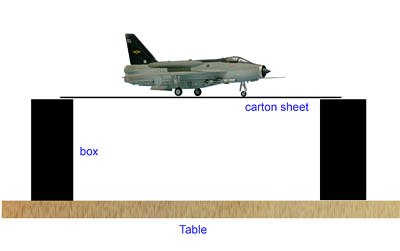
1/72 scale of BAC Lightning F.Mk6
was put on an acrylic sheet sustained between two boxes. This setup is then placed in front of a window facing the sky. (The acrylic sheet was a bit inclined to allow shooting into the sky at the model's sideview)
One thing to note here:
Since the sky is generally brighter than room lighting, therefore an additional light will be necessary to illuminate the model. In this photograph, a flash bounced to ceiling was used to illuminate the model.
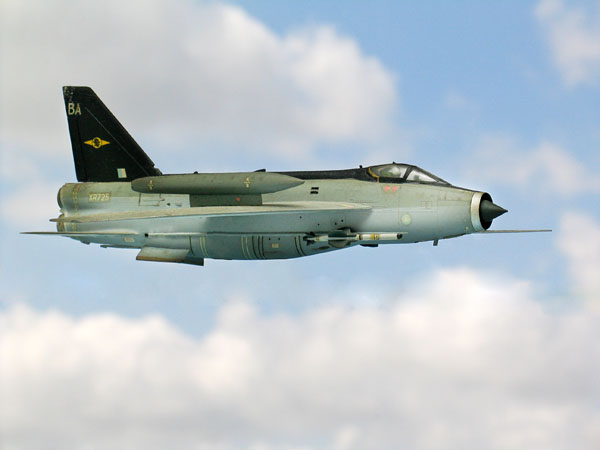
This is the final photograph after digitally manipulated.
The acrylic sheet was erased using Adobe Photoshop, and so did the aircraft's undercarriage.

For those who want to know the detailed steps done in Photoshop to manipulate this image, please click this link:

Details of the process


Click here to go to Next Section