Resources |
| Collections |
| Contact: photoguide@tiono.com |
Chapter 3. Viewing Angle
Revision 1.0 2007. Copyright
by Tiono
Email: photoguide@tiono.com
|
|
|
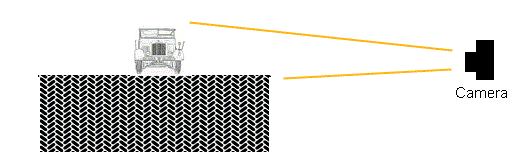
Most of people
who took photograph of their miniature-models will just snap from the
position where their eyes saw. They do not think much about the composition. |
|
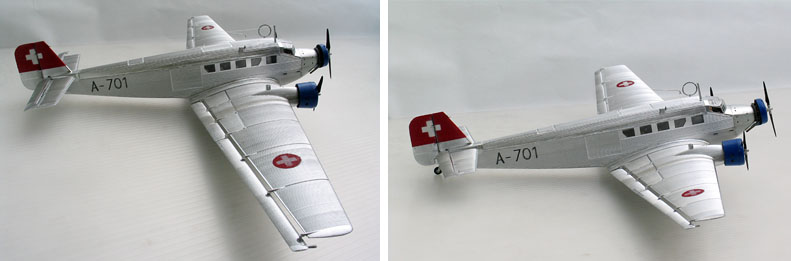
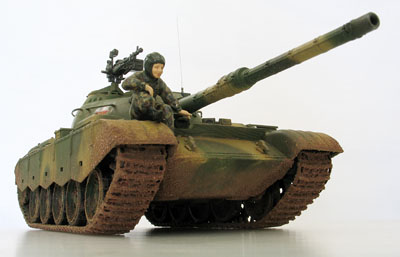
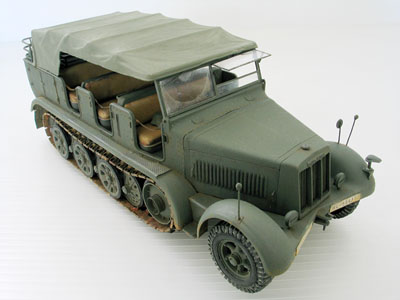
The
above photographs were taken using the same camera, but with two different
focal length. The picture on the left was taken using wide angle lens, and the camera
was close to the subject. While the picture on the right was taken using a mid-tele
lens, the camera was positioned farther away from the subject to maintain
the same subject's size registered on the image. Camera positions Now we will see where to position
the camera.
|
 |
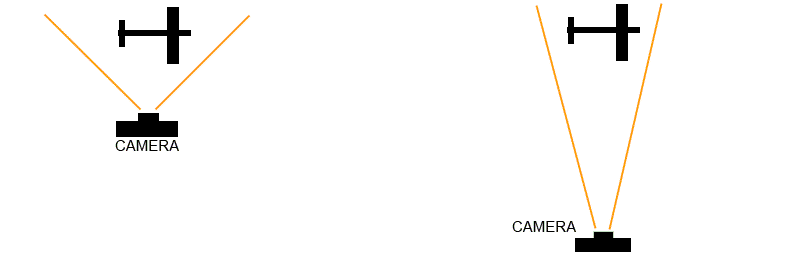
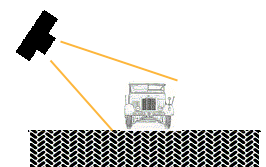
A
ground level view on the corner combined with a wide-angle lens will emphasize
perspective angle, creating an impressive view. While the same ground-corner view created using a lens with long focal length, will give a "flat" view (see the lower photograph). Of course there is nothing wrong with both pictures, it is just a matter of preference: what kind of "look" you want to achieve. But again, take note, that the utilization of wide-angle at ground position most likely will be nice only for a corner view. 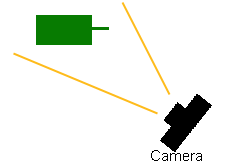 |
 |
|
|
|

|
|
Long
miniature-model |
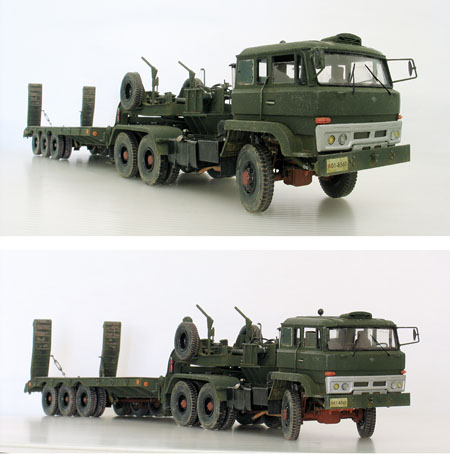 |
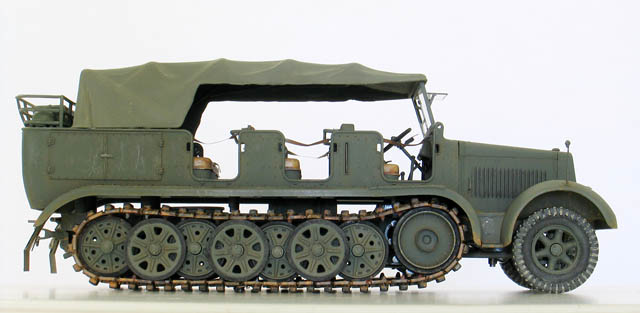
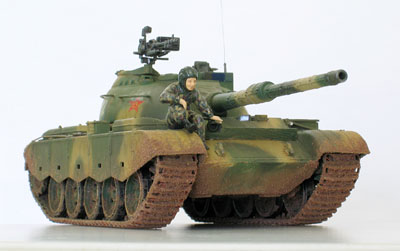
Photographing a long miniature-model can be
tricky. It pose no problem with side-view, but may need some caution when
taking picture from the corner. Taking picture of a long miniature using a wide angle lens from the corner, will generate a model with "compressed tail": the farthest portion of the miniature will be much smaller than the nearest, grossly unproportional. This kind of image may give the impression of an ultra long vehicle, longer than it supposed to be. (See the upper picture on the left) In this situation, longer focal length is preferable. By using a long focal length (mid-tele), the rear portion of the vehicle will have a better proportion. (See the lower picture on the left) But there is a catch: the longer the focal length of the lens, will create a flatter look. Thus the vehicle may look shorter than it supposed to be if the lens' focal length is too long. Therefore if you want to portray a "correct" impression, then you have to adjust the focal length so that the image is satisfactorily proportional. There is no guideline about which focal length is suitable, since it depends on the camera position and angle. So start with a mid-tele, then adjust forward. |
|
|
Long-object will also cause another problem; the depth of field may not sufficient to cover the whole length of the object, thus resulting in out-of-focus (blurry) on some section of the object. This issue will be covered on Chapter 11.
|
Next Chapter >>
|