|
|

|
|
|
Background is a very important aspect in photography. Although it is not the main
object by itself, but it will influence the mood and the look of overall image.
There is a common rule which applicable to photography of miniature-models:
simplify the background.
With a simple background, the attention of the viewer will be focused
to the subject, the miniature itself, not distracted by the background.
A cluttered background will distract viewer's attention and may create
confusion.
So whenever you take pictures of miniature-models, always careful with the
background.
1. Paper/linen background
|
| 
|
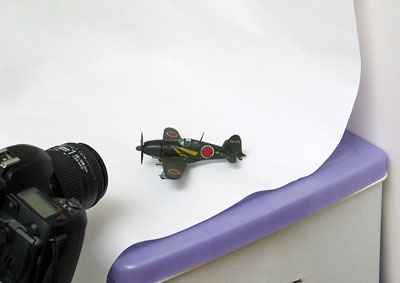
This
is the most common background used for miniature-models photography. Most
of the photographs in this tutorial were shot using this type of background.
The background consists of a sheet of paper or linen, white or colored,
laid on the table while half of it curved vertically.
See picture on the left.
This kind of background is the easiest, can be set up almost anywhere;
on top of a table with the wall behind, even on the sofa. No special equipment
will be required.
The background color, whether black (dark colored) or white (light colored), is your choice. The suitability will depend on the color of the object to be photographed, and the camera's metering capability.
(Read "Black or White Background?" topic at the end of this page)
The most important thing to note: do not use glossy paper. If you have
no choice but to use semi-gloss or glossy, then the lighting must be very
carefully arranged to prevent unsightly reflections.
Paper is usually the preferred material for background due to its properties:
matt and smooth surface. While linen may be good for human portraiture,
but probably not for miniature photographs due to its textured surface.
|
|
|
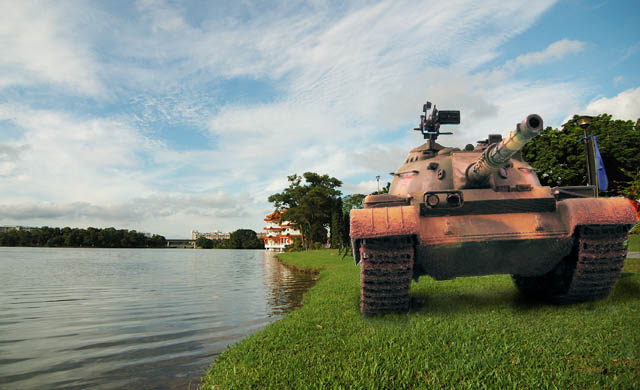
This is another simple background:
find a nice place (usually outdoor) then put the miniature-model somewhere,
and shoot.
Although simple and easy, but sometimes carrying the
fragile model around may not be easy. Lucky if you can find the right place around your house,
otherwise the fragile miniature has to travel.
In applying this background, a careful study has to be carried out on
the area to prevent anomalies. For example:
any "scale-suggesting" objects shall not be visible near the
miniature. Imagine that you take a picture of your 1/48 F-16 and a small
flower sprout out near the plane. Later on the photograph, that small flower
will look like a giant flower.
Objects which causing anachronism, or out of place, shall not be included
either. And the camera is usually at ground-position instead of
elevated (see the previous chapter about "Viewing Angle").
|
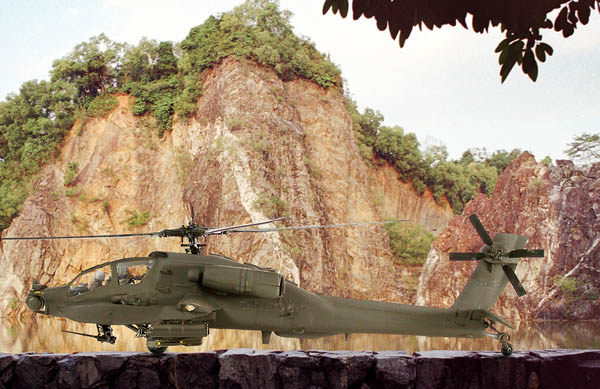 |
This 1/48 scale AH-64 Apache
was photographed against a natural landscape as the backdrop. The helicopter was simply
put on the ledge of a stone-wall and the picture was shot at very small aperture (f/22) to maintain background sharpness. A fill-in
flash was used to illuminate the helicopter so that it will not become too
dark. |
|
|
The idea here is; to take a picture of the miniature-model
in front of another picture, in a similar technique as a studio portraiture
where the subject stand in front of a backdrop landscape.
The weakness of this method is; less flexibility in the composition, and
you will need many backdrops to get many different viewing angle. If you
have only one backdrop, then all of your photographs must be shot from the same viewing angle,
although the miniature itself may be different.
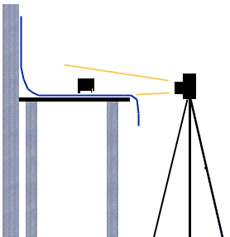
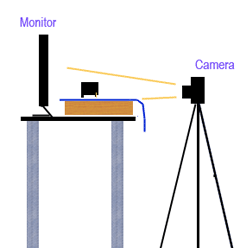
Beside using landscape photo printed on paper as a backdrop, it is also
possible to use a PC monitor, as long as the size of the miniature-model
is smaller than the size of the screen. In the case of PC monitor as the
backdrop, the camera must be set at slow shutter-speed, preferably less
than 1/20 second, except if the monitor is LCD, then higher shutter-speed
will be acceptable.
In using a pre-printed backdrop, you have to be careful about the shadow.
The miniature itself shall not cast its own shadow into the backdrop,
otherwise the photograph will look weird. Therefore put an adequate space between the miniature
and the backdrop.
|
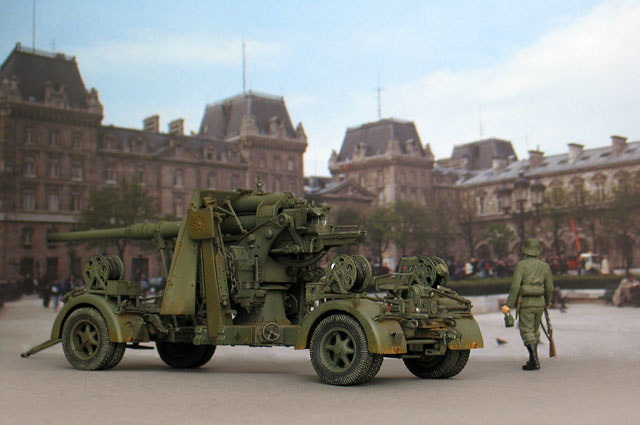
The above photograph of a 1/35 scale Flak 88 was taken with a picture of a building
as the background, displayed on a LCD monitor. To create a continuous ground,
the Flak 88 was put on a sheet of paper with the same color as the ground
of the background photo. The Flak 88 itself was illuminated using
light from a flash thru a diffuser.
|
|
|
4. Superimposed background
|
| 
|
Super-imposed background is
the most complicated among others. In the old days of film, it requires
dark-room manipulation. But in today's digital age, we use computer and
digital images.
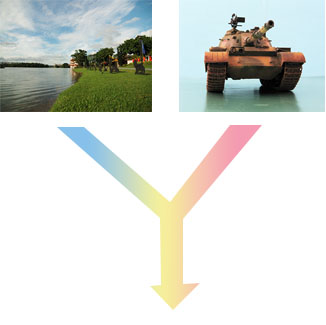
The concept is: to merge two images. The image of the
miniature-model and the image of the background. The two photographs can
be shot separately, but there are things to remember:
- The background of the miniature in the photograph must
be plain color, preferably white or blue. This is to allow easier cutting
of the subject.
- To create a convincing photograph, the quality of light
of the two images must be the same. If you merge two images with different
quality of light, the result will be obviously un-natural.
The technique of superimposing images to create this kind of background,
will be covered fully in Chapter 8. "The Flying Aircraft".
|
|
|
5. Ornamental background & prop
|
|
|
Miniature-models photographed with this kind of background is mostly for
aesthetical or artistic purposes rather than replication of the real scene.
Therefore it is no limit on what kind of objects may be included, although
the basic rule of "simplifying the background" will still be
applicable.
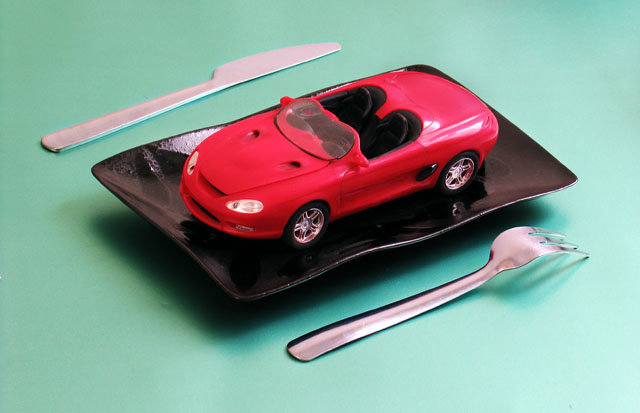
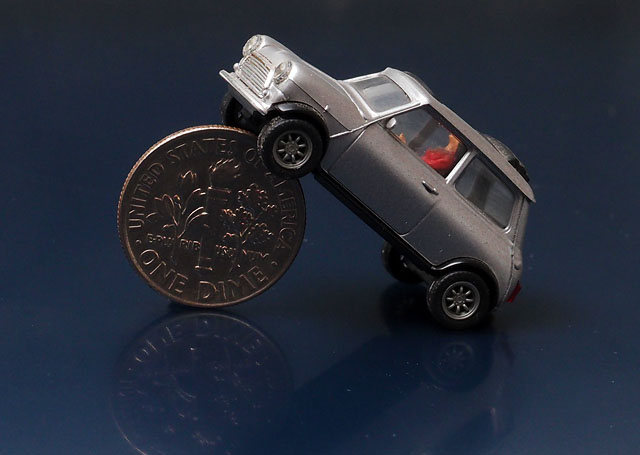
The above photo shows a Ford Mustang in 1/24 scale, photographed on the
dining plate with fork and knife. And below is the photograph of a Mini
Cooper in 1/87 scale made by Herpa, is riding up a coin.
Both photos do not reflect the real scene of the actual cars, but both
of them are nice.
|
Black or White background ?
Black (dark) or white (bright) background are the same as long as being used properly.
However, they may be different for those people who shoot using fully automatic exposure, as the camera's
meter sees differently. Most of camera's meter will try to set the exposure toward 18% grey, therefore it will increase the exposure
whenever it
sees a dark scene, and decrease the exposure on bright scene. This may cause incorrect exposure if the
background's brightness significantly differ than the subject. For example; white car over black background, or dark-green truck
over white background.
Spot-metering will solve this problem. Unfortunately, spot-metering is available only on certain cameras, usually the more expensive model.
Thus for those who don't have access to spot-metering, the best bet would be: Use grey background.
Below are the example of dark and bright background in various combination.
 |
|
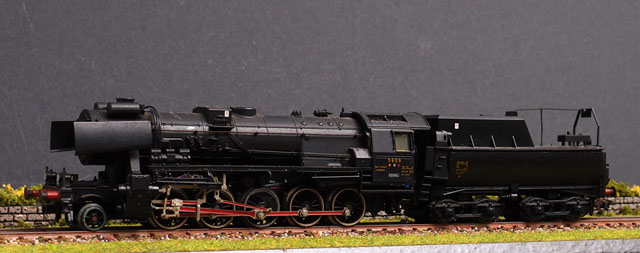
Black model over
black background.
Using automatic exposure
with average metering
.
The camera increase its exposure to compensate, giving a good result.
|
| |
|
|
 |
|
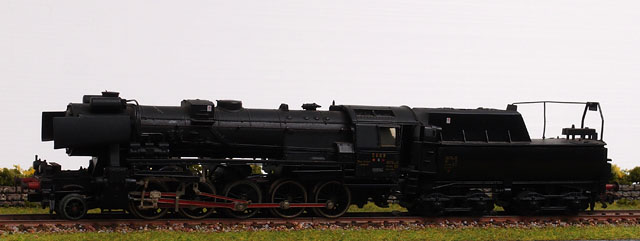
Black model over
white background.
Using automatic exposure with average metering.
The camera reduce its exposure to compensate, and the locomotive become under exposed as the result.
|
| |
|
|
 |
|
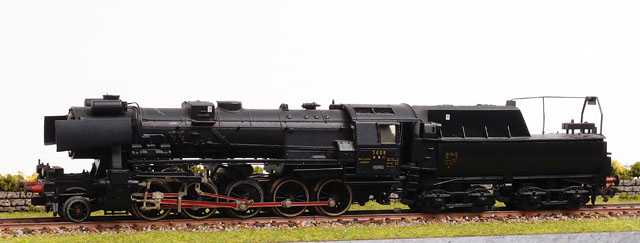
Black model over
white background.
Using automatic exposure with spot-metering.
The spot-metering evaluate only the locomotive body, therefore resulting in proper exposure regardless of the background brightness.
|
| |
|
|
 |
|
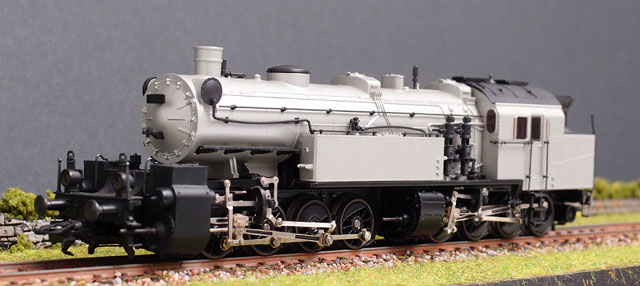
Silver model over
black background.
Using automatic exposure with average metering.
The camera increase its exposure to compensate for dark background, resulting in over exposed locomotive.
|
| |
|
|
 |
|
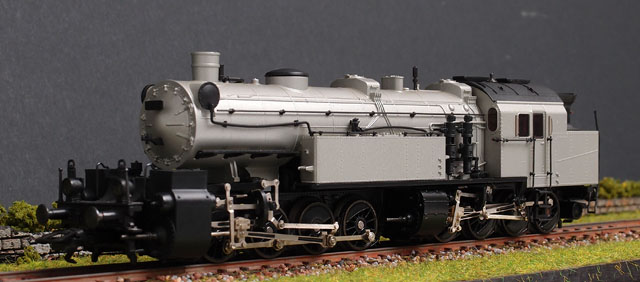
Silver model over
white background.
Using automatic exposure with average metering.
The camera compensate properly to get a good exposure of the locomotive's body (although the black under carriage is slightly under exposed).
|
| |
|
|
 |
|
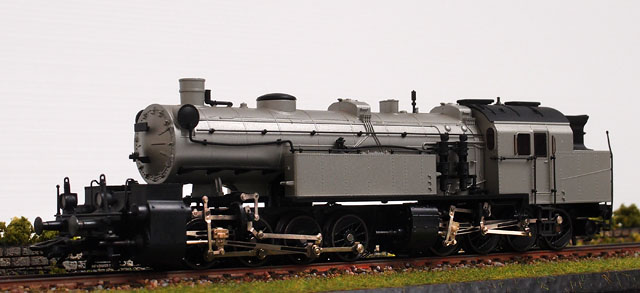
Silver model over
black background.
Using automatic exposure with spot metering.
This is the best result of this combination, and amazingly the spot-meter gave a slightly higher exposure value than the average meter, which resulting in a good exposure of the black under carriage
|
| |
|
|
 |
|
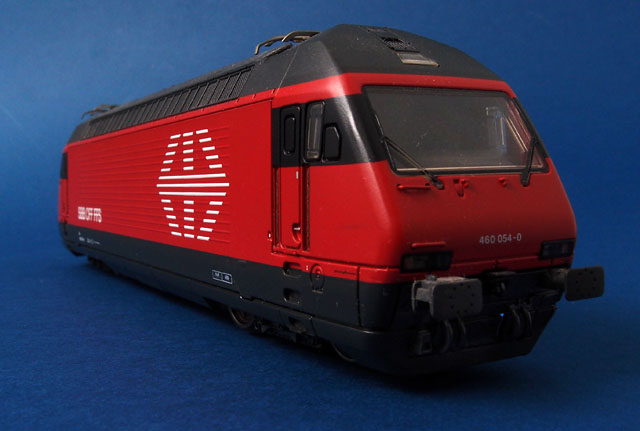
Red model over
blue background.
Using automatic exposure with average metering.
Good result, and the blue background will be useful if the locomotive image need to be cut out for other purposes.
|
| |
|
|
|