|
|
|
|
Selecting
the Subjects
The advantage of high-contrast
lighting is its revealing ability of physical features due to its
prominent shadows. But it will supress painted features and colors. An
intricate details or physical marks will benefit from this type of lighting.
Engine grill, tracks of armoured vehicle, expression of figures, etc.
The high-contrast light will show their textures and intricate details.
But this technique has its downside; painted weathering, such as paint
chip, rust, etc. will simply disappear under this lighting. An armoured
vehicle which looks "dirty" on a brightly-lit photo, may look clean and
shining under the high-contrast light. So you have to select the subjects
of your photo carefully. Adjust the angle of the camera and the light,
then see carefully from the same point as the camera.
Below are several examples:
|
|
|
|
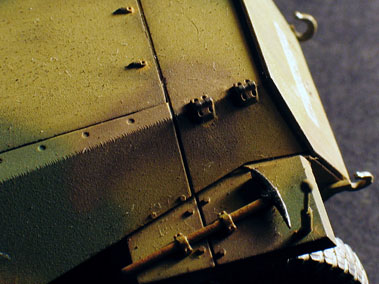
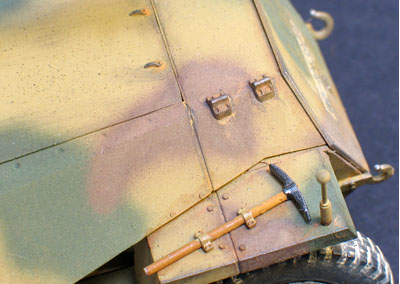
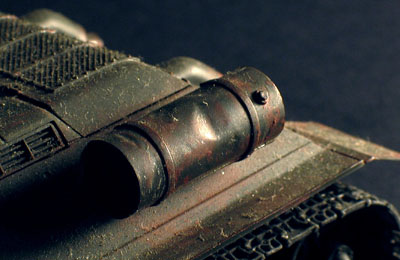
These
are pictures of a SdKfz.251's bonnet, 1/35 scale model, taken using
two different lighting. The photo on the left was taken using high contrast
lighting, while the right photo was taken normally under diffused light.
The left photo clearly shows the welding marks on its upper end of
side wall. This photo also shows the coarse, grain-textured skin.
Try to compare with the photo on the right; the welding marks disappear,
and the skin seems as smooth without texture. But the right photo
shows the camouflage colors better.
|
|
|
The high contrast photo can be used to enhance the picture of textured
surface, intricate details, or some delicate parts, whereas a brightly-lit
photo will not be able to show.
|
| |
|
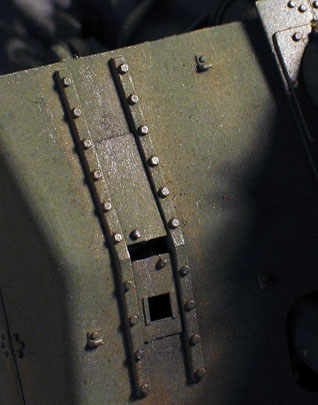
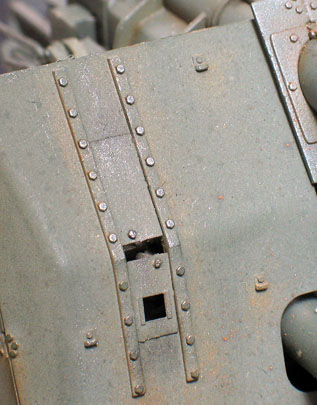
This
is another comparison. The subject is a gunner's window on a Flak
88 (1/35 scale). The high contrast lighting is good to enhance intricate
detail like this. It makes the hex-bolts more pronounce, altough
the color may not register properly. The high contrast lighting
is not meant to show colors, its main goal is to show physical attributes.
|
|
|
|
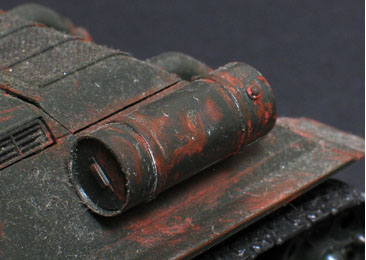
The
above pictures were taken from the same model, but with different lighting
method.
It shows a fuel tank on a 1/35 scale T-34 tank. The photo under diffused
light shows all of the colors, including the paint splatters, while
the high contrast photo showing less colors, but revealing its physical
attributes. See the dented fuel drum, the engine grille, and the tracks' pattern.
|
|
|
Further attention must also be taken on decal, if
any. Since the photo will emphasize texture, therefore it will also emphasize
the decal's thickness and reflectance. The decal will look like a thick
sticker pasted on the model, which is not desirable. To prevent this happening, the
photographer shall adjust the light and camera position.
|
| |
|
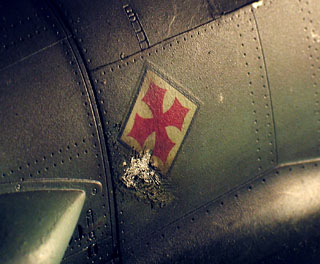
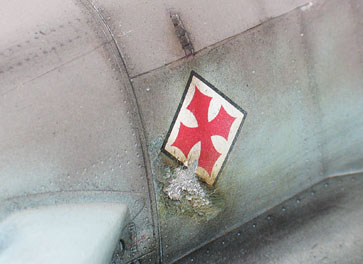
Decal
is considered as a sensitive part on a model, especially military models.
Modellers spends time and effort to make the decal blend naturally
into the paintwork. But whatever they do, the decal will still bear its
thickness. It will not be an issue under common lighting, as shown
on the photo above, at right. This decal on a model of Bf-109, had
been treated with decal softener and coated. It blends naturally in
that photo.
However, if the lighting was changed to high contrast, the thickness
of the decal may appear, as can be seen on the photo at left. This
is undesirable condition. The photographer shall alter the camera or
light source angle to prevent this situation.
|
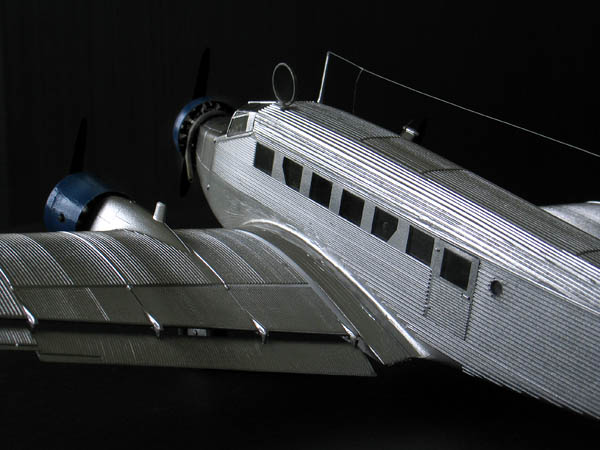 |
Junkers Ju-52
in 1/72 scale
The corrugated skin
make it an ideal subject
for high contrast lighting |
|