Resources |
| Collections |
| Contact: photoguide@tiono.com |
|
|
Setting
the Exposure The simple steps to measure the correct exposure are as following: |
| 1 |
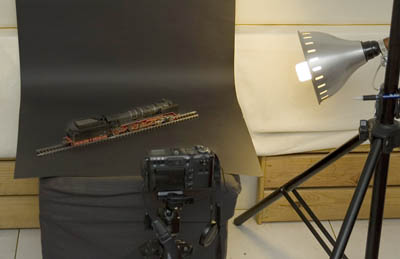 At the start of each step, after preparation of the models and light but before taking any photograph, put a grey paper at the front of the models. Slant slightly so that the light will illuminate it. Note that the paper must be grey color (called "grey card" or "18% grey" in photography). This is due to the camera's metering system which by default was calibrated to measure "grey tone". If you don't have grey paper, you still can use ordinary white paper, but have to adjust the exposure later on. |
2 |
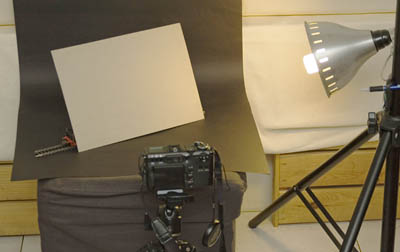 Now take measurement using the camera. Usually by pressing the shutter halfway, the camera will display the measured exposure (the value of aperture and speed). Write down those values. If your digital camera is unable to show the exposure measurement, then you have to press the shutter, take one picture of the grey card. Then see the file, either directly thru the camera or thru a computer, check its EXIF data. It will show all of the values related to exposure. |
| 3 |
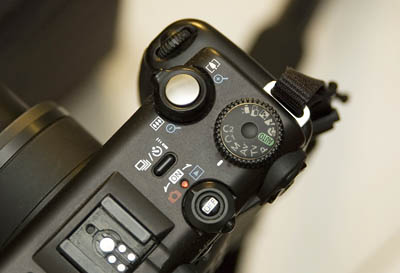 Set the camera to manual exposure mode, then set the value of aperture and speed, as according to the values acquired on step number 2. (please consult the user guide of your camera if you do not know how to do it). Do remember that "manual mode" is not referring to focusing mode. You do not need to change the auto-focus mode.. |
For
those with fully automatic camera without manual mode, may still use the
same steps provided here, except that the blank grey-card shall be substituted
with a patterned paper (example: a magazine page which has a grey background,
or a photo). Put the paper exactly on the side of the model, and focus
the camera to the paper. Keep holding the shutter half-way, then take
out the paper, and press the shutter. |
|
4 |
|
||
| Exposure Adjustment Sometimes it is necessary to adjust the exposure by increasing one or
two f-stops from the value given by the camera. This adjustment will be
needed whenever the color of the object is dark.Usually by increasing
the exposure around one to two f-stops.
|
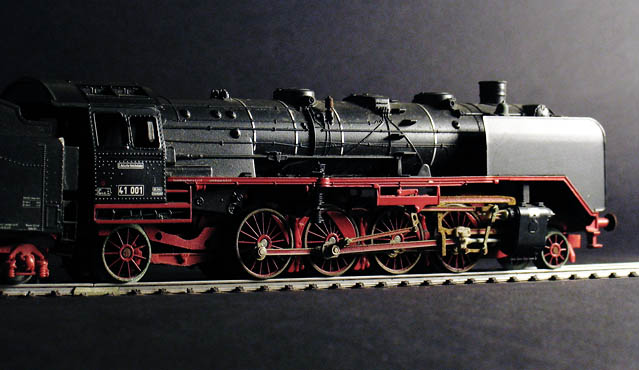
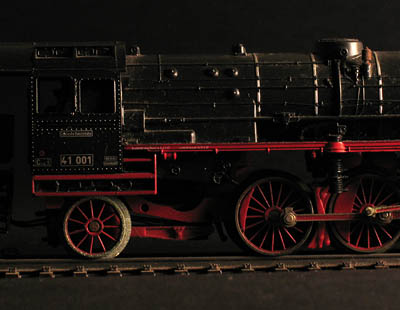 The photo above was taken using exposure values as measured by the camera using grey card. ( aperture = f/8, speed = 1/8, ISO = 100 ) It looks too dark, under-exposed, only the highlighted areas appear properly bright. |
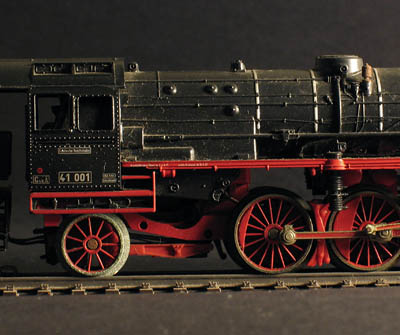 The photo above was taken using the adjusted exposure values. Increased by two f-stops. ( aperture = f/8, speed = 1/2, ISO = 100 ) It looks better now with more visible body lines. |
|
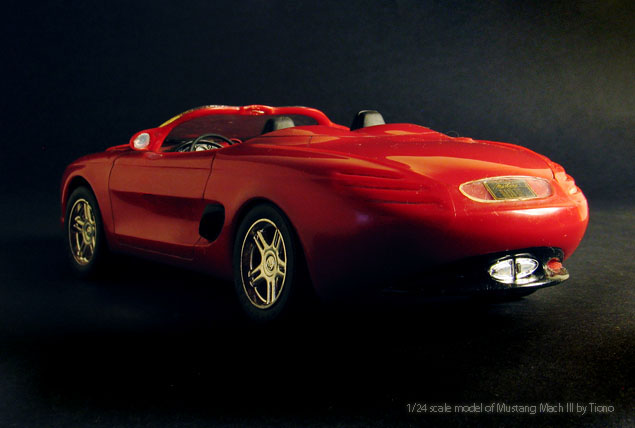
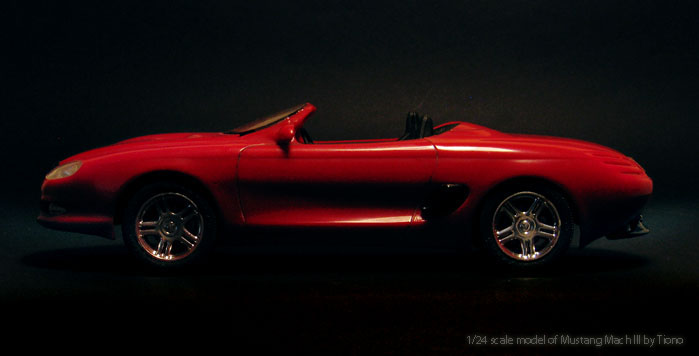
Below is another example of high contrast photo: The sleek and curvaeous body of Ford Mustang Mach III
was replicated faithfully in this 1/24 scale model.
|
|
|
|
Do you want to know more about the implementation of this photography
technique? |
| Click here
to go to Previous Page
|
|
Click here to go to Next Section of this Chapter |
Next Chapter >>
|