|
|
|
|
Multi
image super-imposed; the steps
|
Note:
This section requires certain level of expertise in using Photoshop.
Combining two images, is not always easy. In fact, this is the most tedious
process if you want high quality result. Some artist skill and patience
may be required.
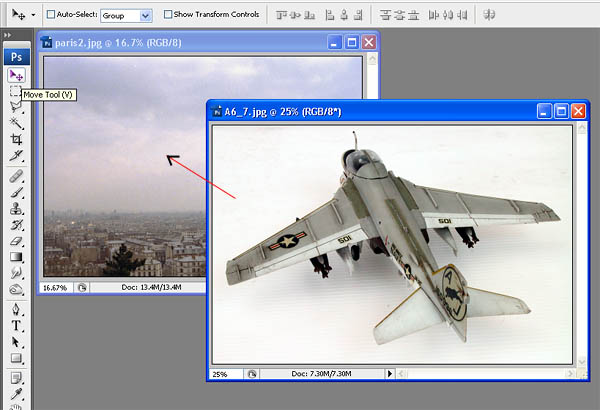
First, open both images. And
use the Move Tool at Photoshop, click the plane's photo and drag it into
the background photo. |
|
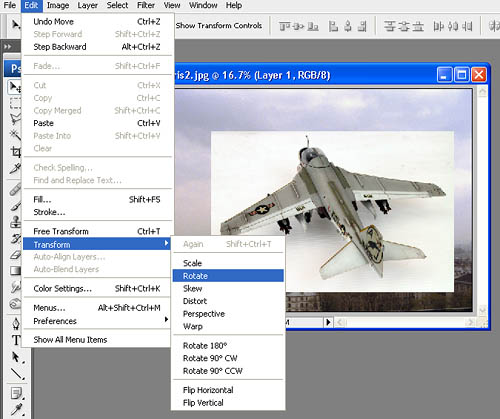
After the plane's
image was moved into the background (as a new layer in Photoshop), then
rotate and resize it as what you want it to be. Use the Edit menu -->
Transform ---> Rotate.
|
|
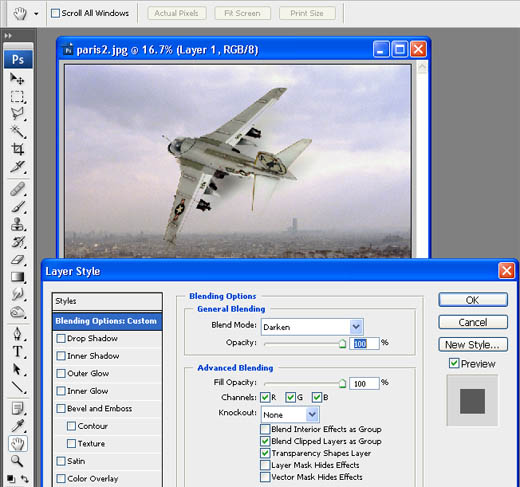
Select the Layer
menu --->
Layer Style ---> Blending Options
It will pop up a dialog window.
Set the Blend Mode to 'Darken'.
And you will see the white paper at the plane's photo suddenly disappear.
This is only applicable if the background image is darker than the plane's
background.
If you're combining dark images where the plane's background is black,
then the setting should be 'Lighten'.
|
|
| Some of the
area near the plane was not disappear, especially the shadow area, since
it is darker than the background.
We have to erase this area manually.
Select the area using the selection tools, and the cut it out by selecting
Edit menu ---> Cut
The undercarriage which is also visible in the photo, will be cut too.
|
|
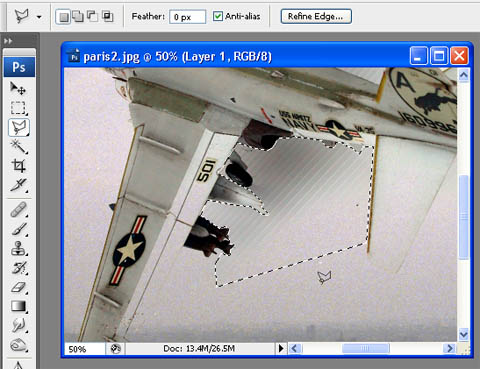
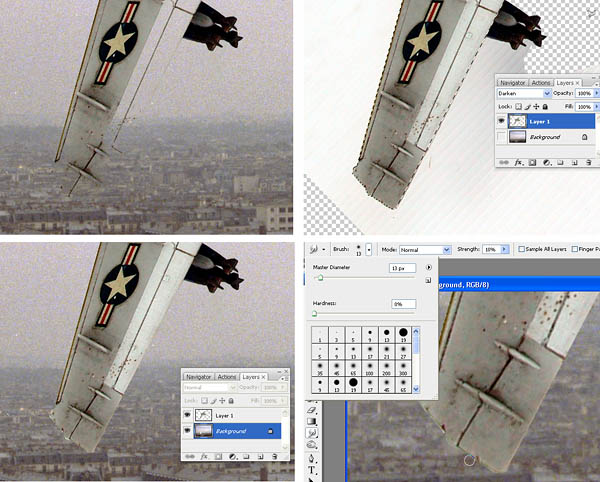
Now find all
areas on the plane which has a lighter color than the background. Those
areas will need more touch-up because the background "bleed"
into it.
For example; the wing (see first picture on the right)
On the layer window, disable the background by clicking the eye-icon.
Select the plane's layer.
Use selection tools to create a selection mask around the wing (top right
picture).
Go to layer window again, select the background, and enable it. Then cut
the selected area. Now the wing is visible without background bleed.
If more accurate result is desired, then trim the edge by using Smudge
Tool. Set the brush small, and Strength lower than 15%. Trim the edges
to smoothen and eliminate bright spot.
|
|
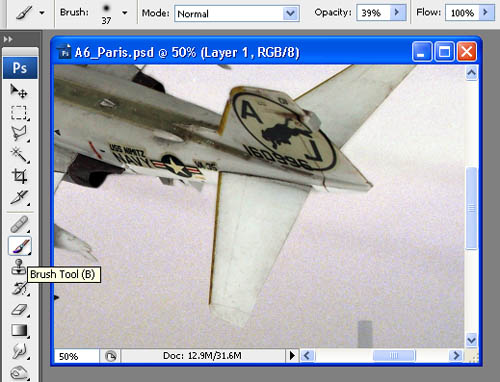
| We can stop
here. But sometimes a thin line of exhaust fume, will make the picture
looks better.
The exhaust fume was actually painted into the image.
Create a new layer, then paint the fume using brush tool with Opacity
set to very low.
Once everything is okey, don't forget to flatten the image if you want
to save it in JPG.
|
|
|