|
|

Cleaning up Incorrect Blending
The automated processing to blend layers is impressive. It is smart enough for certain pictures. But sometimes the algorithm is not good enough to produce a totally clean focus-stacking, there are some patches of blurry parts on the resultant image. This will need a cleaning up on the layer mask, which should be done manually.
Now lets look at the following example:
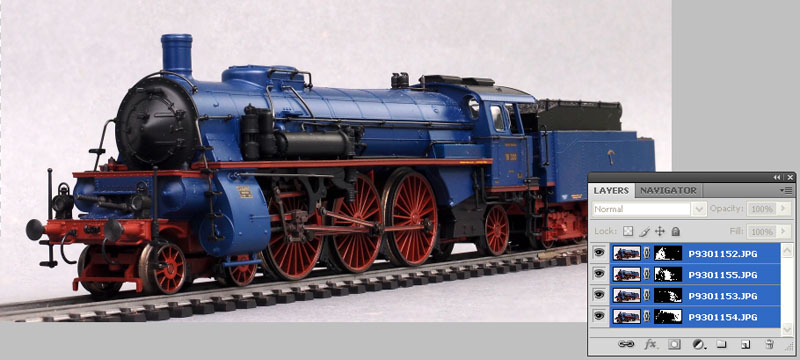
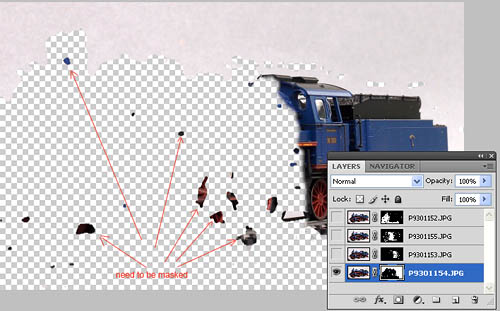
The picture below shows the screen after four images were stacked using the procedure described at Chapter 11.
Photoshop created layer mask on each image, so that there are four layer masks. On the Layers-window, each layer is represented by three icons; "eye" icon is representing the layer's visibility. Click on this icon to toggle between "visible" or "not visible" (hide or show) of that particular layer.
The thumbnail image, is representing the bitmap of the layer's image. Click on this thumbnail if you want to edit the bitmap.
The layer mask thumbnail, which looks like a patchy black and white rectangle, is representing the layer mask. Click on this to edit the layer mask.
|
 |
|
|
| |
|
|
 |
|
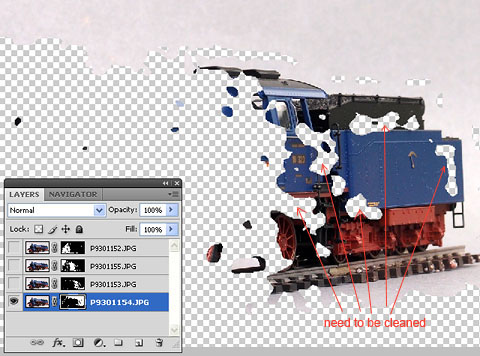
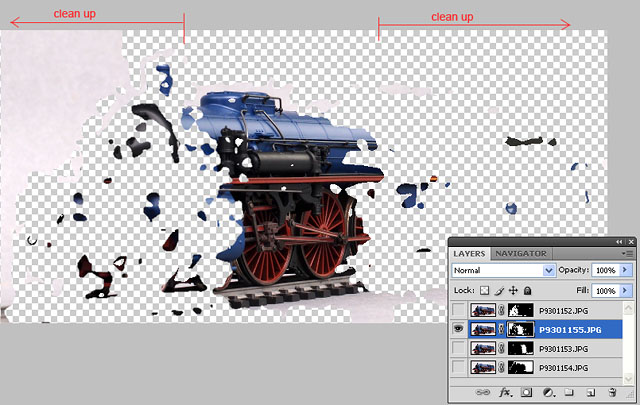
To clean up the layer mask, arrange the layers sequentially to the in-focus images.
Start working on the lowest layer by hiding the top three layers and clicking layer mask icon on the lowest layer. The screen will show as picture on the left.
Notice the patchy transparent blobs, which has to be cleaned. |
| |
|
|
 |
|
Those transparent blobs are masks which hiding the image. We want to erase those masks to reveal the image since we know
that it is part of in-focus area.
To erase those masks, use eraser tool.
Swipe the eraser on those transparent blobs, and the mask would be erased, revealing the image.
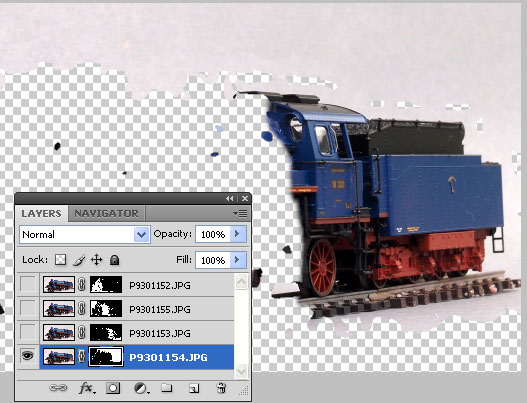
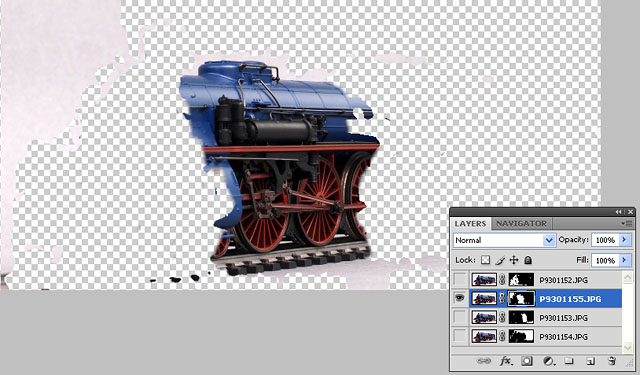
Picture on the left shows after the masks
were erased. |
| |
|
|
 |
|
Now we need to mask the out-of-focus area which uncorrectly unmasked by Photoshop.
Look on the left part of the image, there are several image blobs. These need to be masked.
To do this, use
the brush tool.
Swipe the brush on the image blobs, and it will be masked, become transparent.
Do the above two steps; masking and erasing, on the other layers as well.
|
| |
|
|
 |
|
This is the screen of layer number 2, before being cleaned.
|
| |
|
|
 |
|
And this is the screen of layer number 2, after being cleaned.
After all layers had been cleaned, then you can show all layers and verify whether there are some incorrect masks.
Once satisfied, then flatten the layers, and save.
The picture below shows the final result
|
| |
|
|
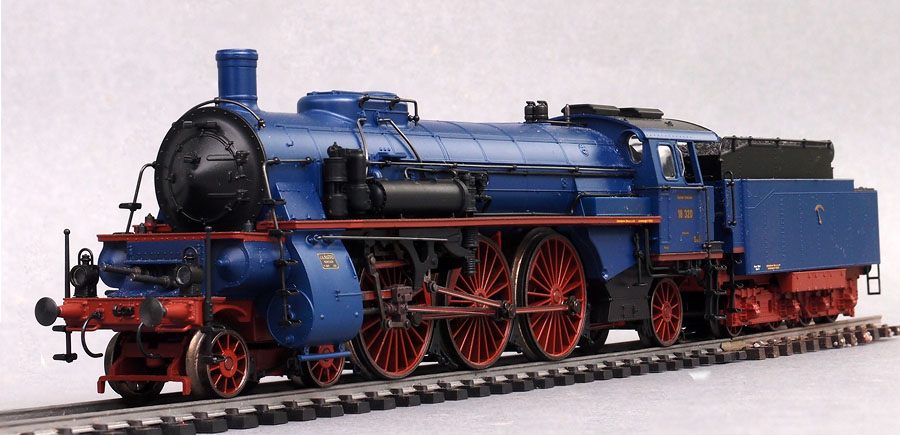
1/87 scale model of German BR 18.3 (Baden IVh) locomotive, produced by Marklin in 2012.
Photographed using small sensor (1/1.6") digital compact camera, and focus-stacked to achieve extra wide depth of field.
|